Organ Donor successfully completed a deployment at Burning Man
2015 as part of Sol Diego's Wonderlust Arcade installation. The five-day
deployment was located with 28 other regional projects under tents at the base
of The Man. The “Midway” was open 24 hours a day from event
start until 5pm Friday before the burn.
The Wonderlust Midway
installation included a forced perspective building and a variety of arcade and
midway games and a Zoltar booth. Games were designed and built by members of
the Sol Diego team. An article about the forced perspective construction and
the games can be found at:
http://www.sdcitybeat.com/sandiego/article-14497-sol-diego-brings-immersive-art-to-burning-man.html
Setup took Organ Donors Paul and Abraxas about 8 hours over two
days to complete, including ferrying components and tools out to the Midway
(with a 5 mph speed limit). Conditions were windy and dusty, with visibility
falling to zero at times. Organ Donor setup had to work with and around all the
other teams setting up their art installations.
Substantial changes to the console and software were made from
the previous deployment. A new console design was introduced. The minimum
desired software functionality was completed on the second day, about an hour before
event start. More ambitious software plans, including touchscreen support and
graphical user interface features, would have to wait for a later deployment.
The new organ console (version 2.0) improved stability and
function. Sturdy legs from IKEA, a cut down IKEA tabletop, and a custom
laser-cut cabinet were key elements of the new console, replacing the
lightweight folding stage stand and small custom control panel. The console
would no longer tip over (or blow away!) as easily, and had improved aesthetics.
The two manuals (that is, organ keyboards) and MIDI combiner and coupler
management software were carried over from version 1.0 of the console. Version
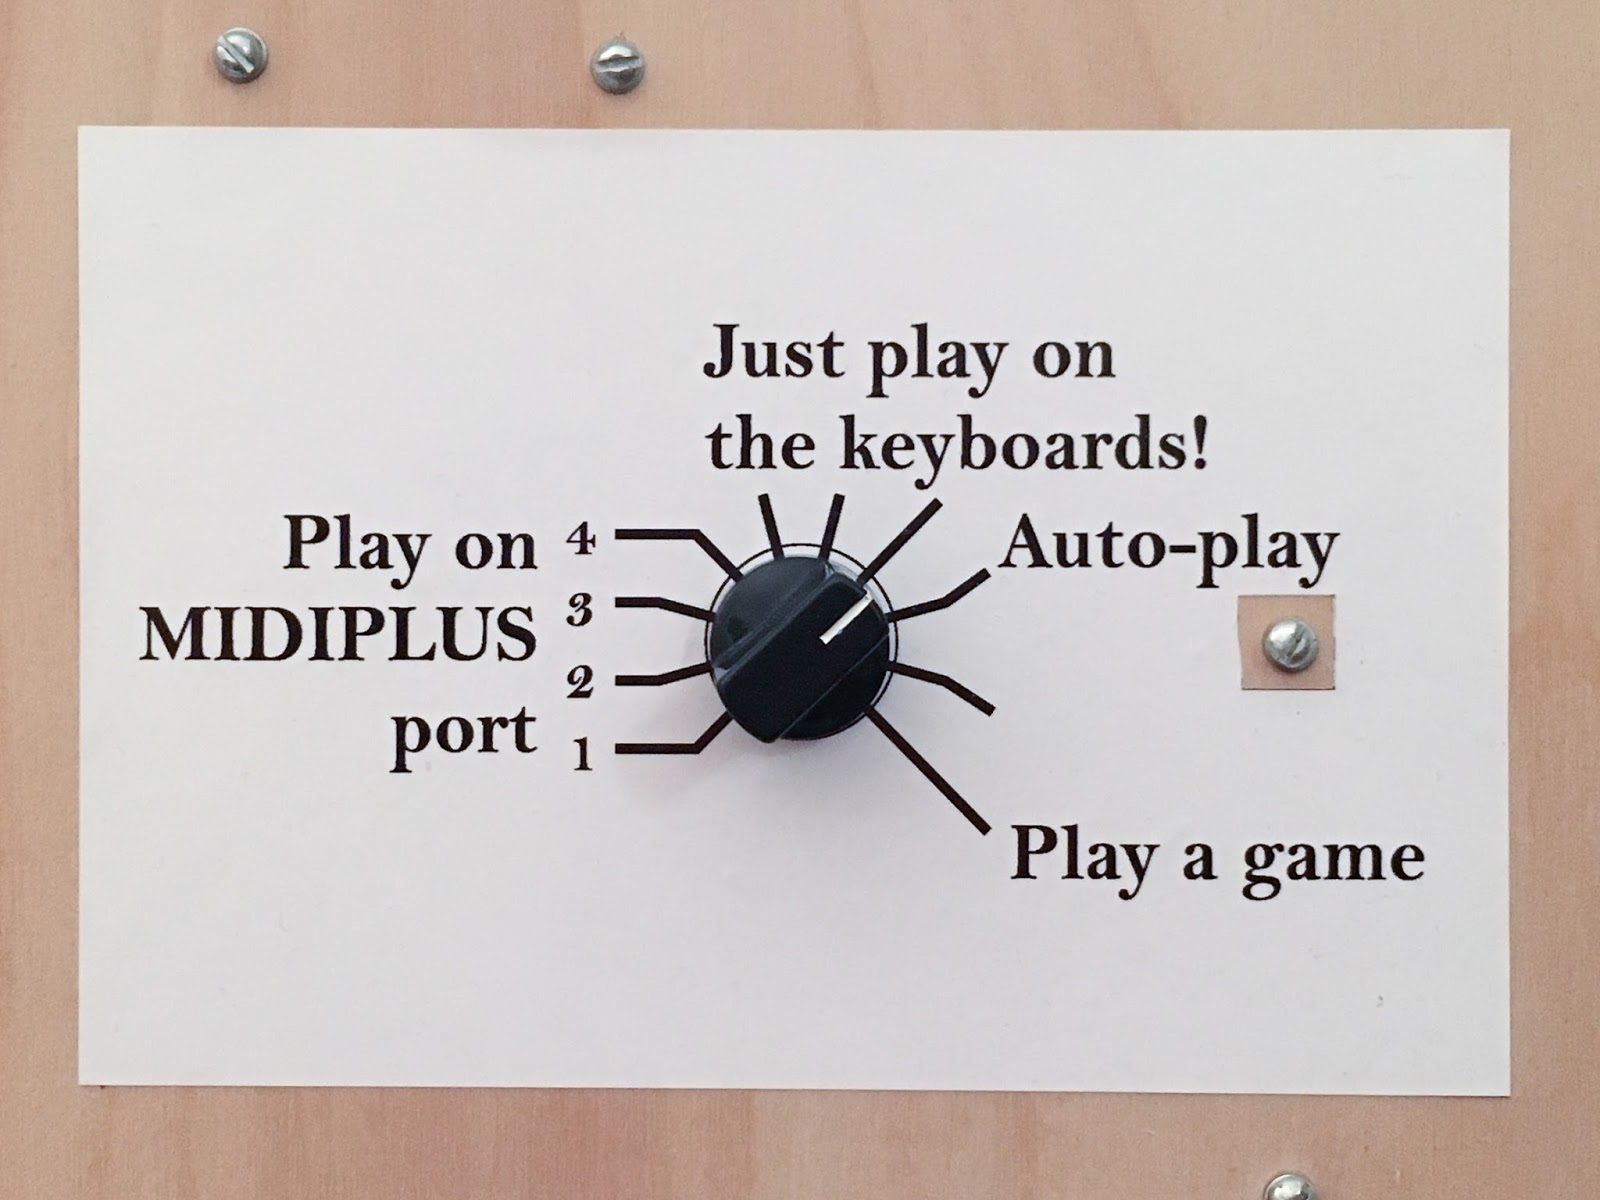
2.0 added a sheet music stand, an LCD touch-screen, a selector knob, and a
laser-engraved diagram to label and explain
the stops and coupler buttons. The touch-screen and selector knob were managed
by a Raspberry Pi 2 with software written in Python, and the active coupler
diagram was managed by an Arduino MEGA 2560.
No substantial changes were made to the pipes, racks, windchest,
or blower box. A minor rearrangement of the pipe positions around the rack was
necessary to accommodate the shape of the limited space available.
The first failure was with the windchest, which is made of
laser-cut acrylic. The front bottom left edge of the windchest leaked during
the first pressurization. While the proper solvent-based acrylic cement could
be purchased from Reno, that would involve a lengthy trip. Fortunately, Organ
Donor Bigun had acrylic cement in his kit. We borrowed a tube, applied the
cement, and clamped the windchest closed. This seam held for the duration of
the event, possibly because we left the clamps in place. Organ Donor Bigun
recommended the addition of a square acrylic rod glued along the seam on the
inside of the windchest as a reinforcement. Since the seam is somewhat long,
this reinforcement would reduce the amount of flex that probably caused the
seam to pop.
The second failure was of both keyboards. When tested after a few
hours of dust storm during
setup, about half the keys on both manuals were no longer working. We suspected
dust fouling the contacts inside the keyboard. With the dust storm continuing
and worsening, the keyboards were removed and taken back to Copper Home, Organ
Donor's support trailer at Wonderlust Camp. The keyboards were disassembled and
inspected. Each key has a series of blue rubber boots that provide domes for
each key to press down upon. A contact beneath each dome is actuated when the
dome is compressed. Dust had worked its way beneath the rubber boots. The factory design looked more than
adequate for normal conditions, but wasn't up to being inundated with playa
dust.
A repair was proposed. We would thoroughly clean the contacts and
the rubber boots, then use silicone sealant to completely seal the dust boots
to the circuit board. The rest of the interior of the keyboard would be allowed
to collect dust. Since the rest of the keyboard consisted of mechanical action
and the components on the circuit board, confidence was high that the repair
would work.
Both dusty keyboards, and the clean pair of backup keyboards,
were treated with silicone sealant. In order to replace the dust boots, tool
improvisation was required. The rubber plugs that anchor the dust boots would
not fit back into the holes by finger pressure. Very small holes were observed
at the top of each of the rubber plugs/feet. An unwound paper clip worked
perfectly to refit the rubber anchor feet. The strip of dust boots was placed
in the correct position, then the paper clip gently pressed into the hole over
the top of each plug/foot. The foot then slipped into the hole with no
difficulty.
Photos can be found here:
https://www.flickr.com/photos/w5nyv/albums/72157658511444682
After the keyboards were treated with sealant, they were returned
to the console in the Midway. On the final day, one of the repaired keyboards
failed, with just two keys no longer responding to key presses. This was
swapped out for one of the backup keyboards. This keyboard worked the rest of
the day until close of Midway. The other repaired keyboard lasted the entire
event without failures. Later examination showed that we left gaps in the
silicone sealant at each of the places where keys failed.
Software functionality for the Midway exhibit consisted of two
modes, keyboard and jukebox. Jukebox mode was where Organ Donor played files
from the songs directory in the Raspberry Pi. Keyboard mode was where the
participant played the keyboard. Participants could play the keyboard at any
time, but keyboard mode turned off any MIDI signals being sent to the windchest
from the Raspberry Pi.
The Organ Donor received overwhelmingly positive feedback. Conservatory
students, amateur musicians, and people that don't have any experience playing
a keyboard all were encouraged to play Organ Donor.
One participant, Anthony Decognito, made up songs
extemporaneously about other participants. He inquired as to their city of
origin, made up a melody, and improvised a song. This was hugely successful.
Several pop-up concerts were held by people that happened to have
large amounts of music memorized. The team greatly appreciated the willingness
of so many participants that freely shared their talents and training. Crowds
gathered in waves to listen and play.
The jukebox mode was freely used. While several lost and found
items were recovered, no obvious abuse occurred. While at least one participant
used a very unconventional body part to play the keyboard, Organ Donor was
unscathed by heavy participant use.
Complete set of photos from the deployment can be found here
https://www.flickr.com/photos/w5nyv/albums/72157656113224673
We found that most people didn't really study the coupler
diagram, and were generally unwilling to read the verbose text-mode displays on
the LCD to understand how to switch between keyboard and jukebox modes. This
wasn't entirely surprising, but it did spark some discussion and decisions on
how to improve the console for version 3.0.
With some strategic text placement, the coupler diagram could
perhaps be improved to the point of not requiring a lot of explanation. During
exhibition, it did not take much additional explanation to make the coupler
diagram come alive, but the fact that it did take some additional explanation
at all means there is room for improvement in this particular interface. Plans
are in place to improve this particular interface for San Diego Maker Faire
(3-4 October 2015).
For the LCD screen that showed status and gave instructions for
jukebox vs. keyboard mode, it was felt that a big image on the screen and
callouts on the knob would improve ease of operation.
Upon return to San Diego, the blower box, windchest, and pipes
were cleaned with compressed air and damp cloths, and Organ Donor was set up
for San Diego Maker Faire improvements.
Anyone interested in the project is welcome to follow along and
is invited to consider becoming an Organ Donor. The project needs skills of all
types, including machine learning, coding, user interface design, game theory,
carpentry, laser cutting, 2D and 3D modeling, 3D printing, and many other
areas. Contact Abraxas or Paul by sending a message through this site.